Quick Start Guide
This guide will help you get up and running with NotallyX quickly. We'll cover the basics of creating and managing notes, so you can start being productive right away.
Creating a Text Note
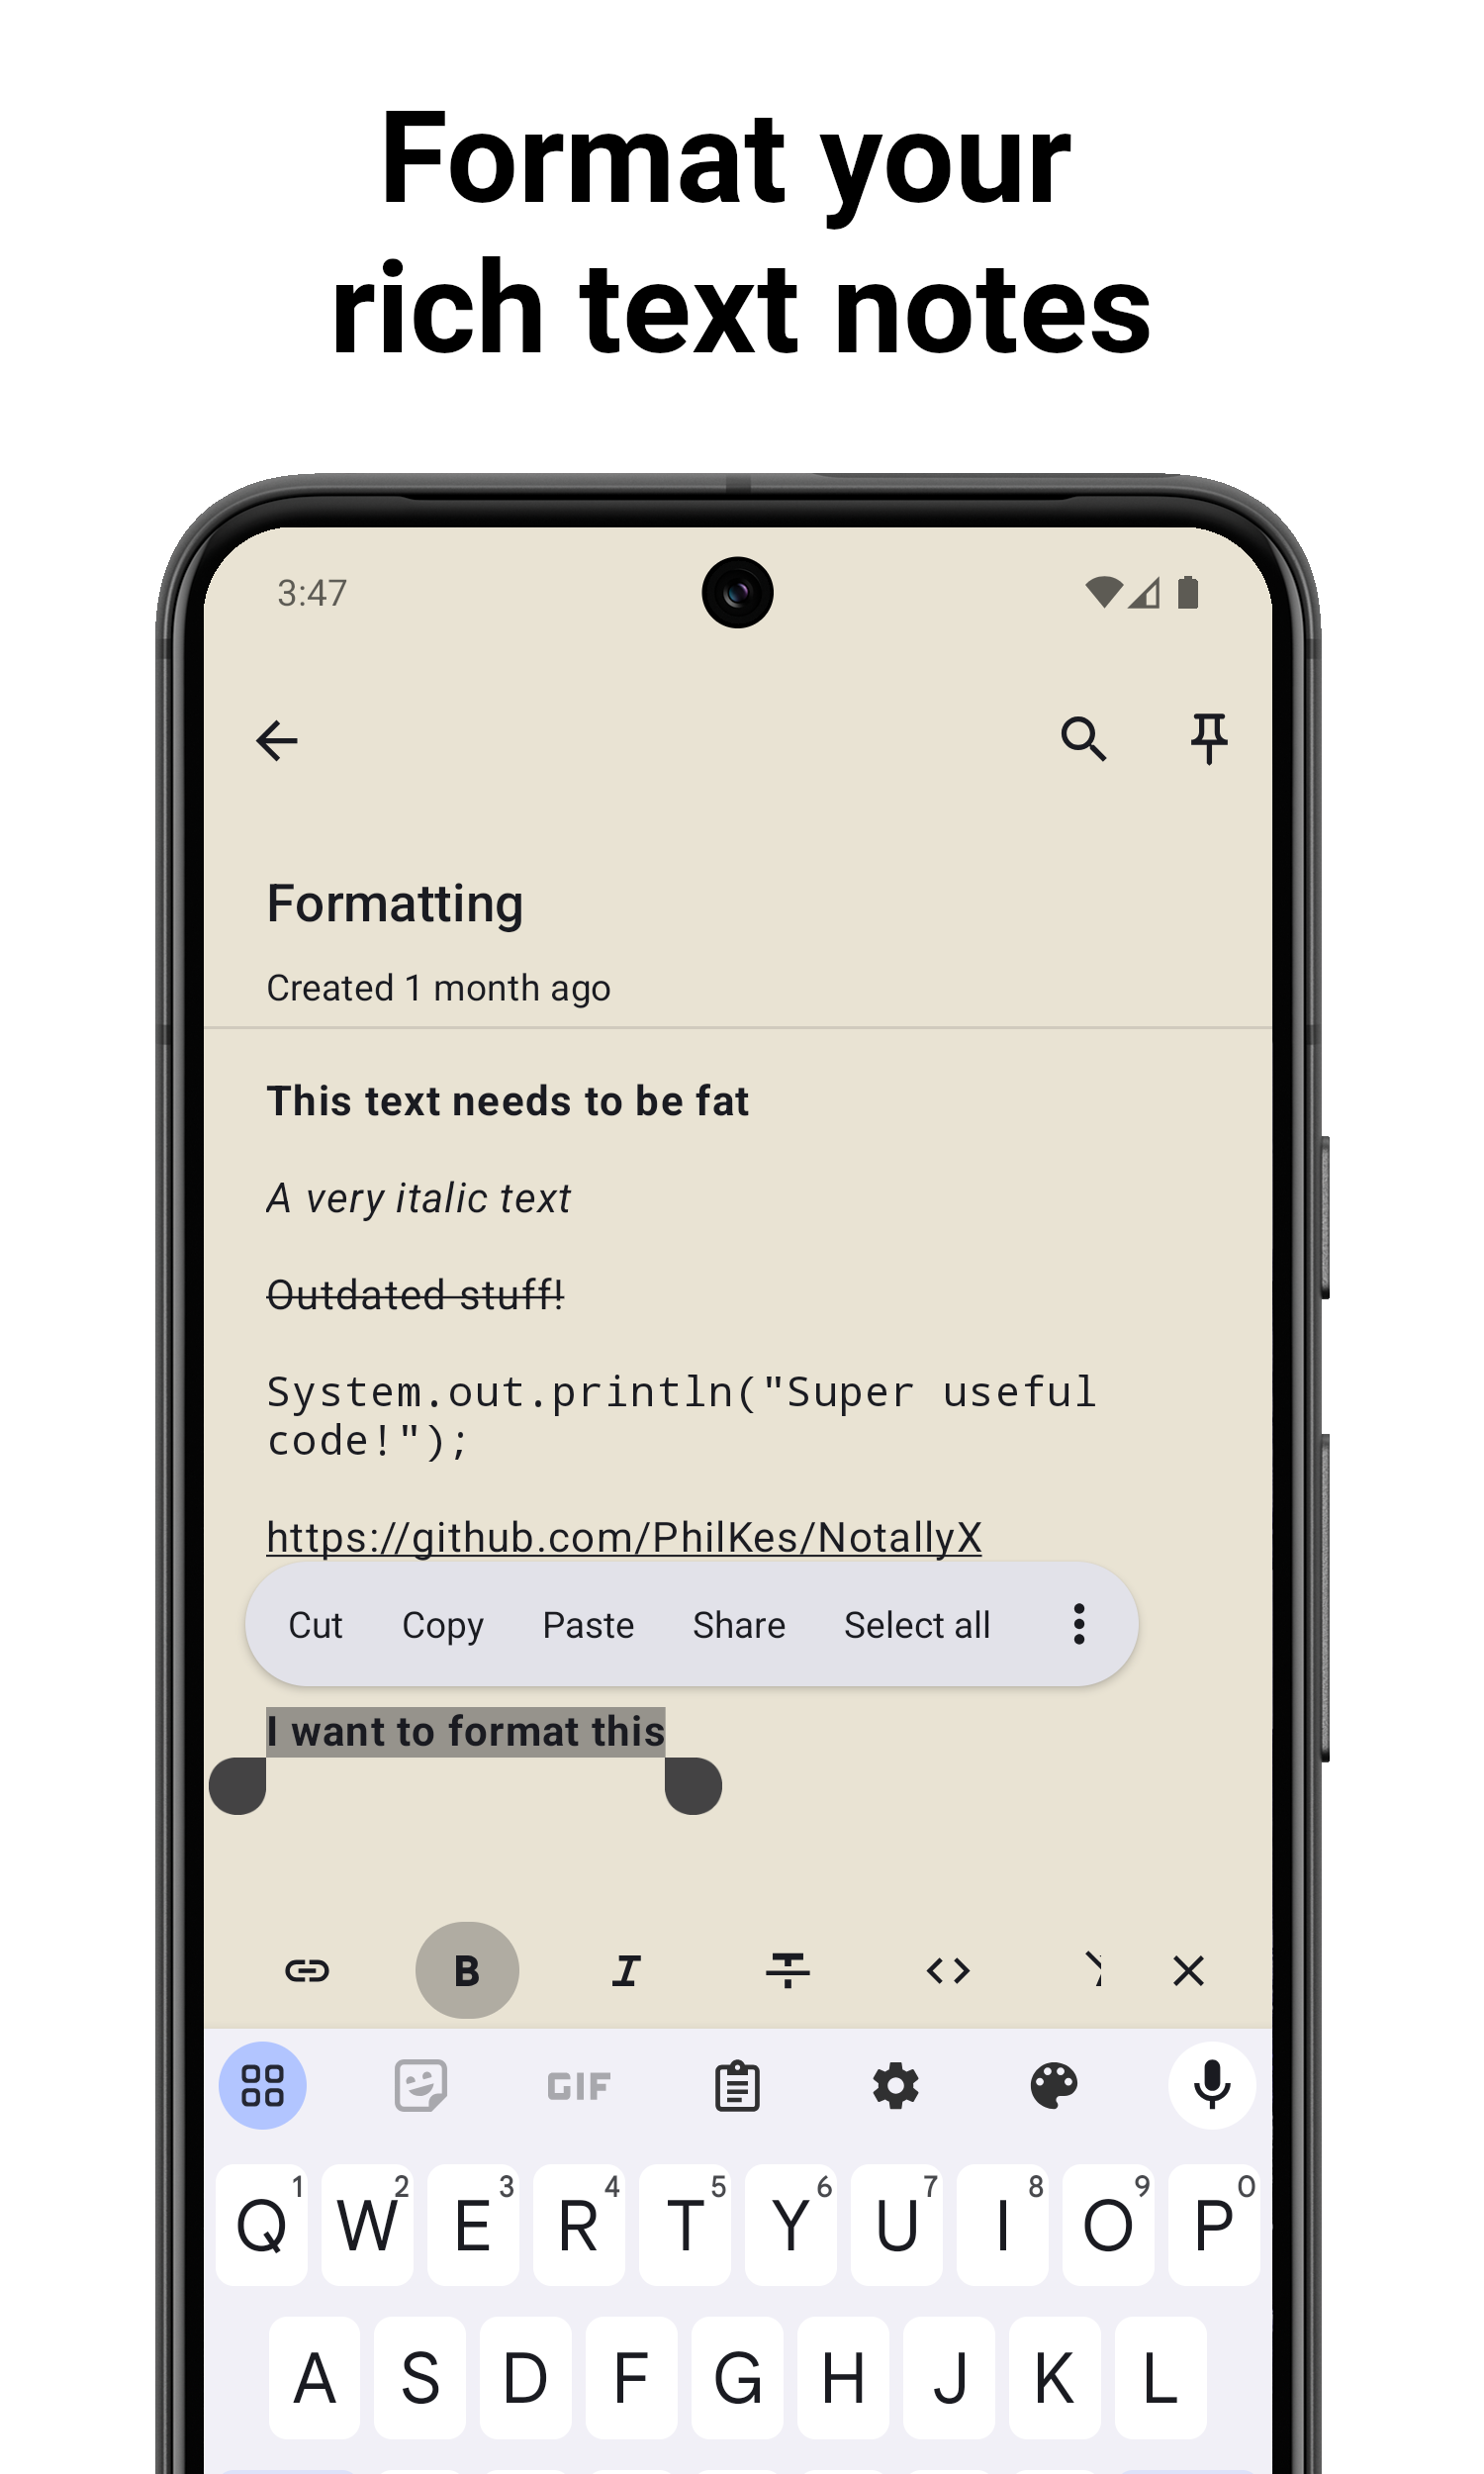
- Tap the ✏️ button on the lower right
- Write your note content
- Use the formatting toolbar to apply:
- Bold: Tap the B icon
- Italic: Tap the I icon
- Strikethrough: Tap the S icon
- Monospace: Tap the M icon
- Enter a title for your note (optional)
- Tap the back arrow to save and return to the notes list
For more details see ✏️ Rich Text Formatting
Creating a List Note
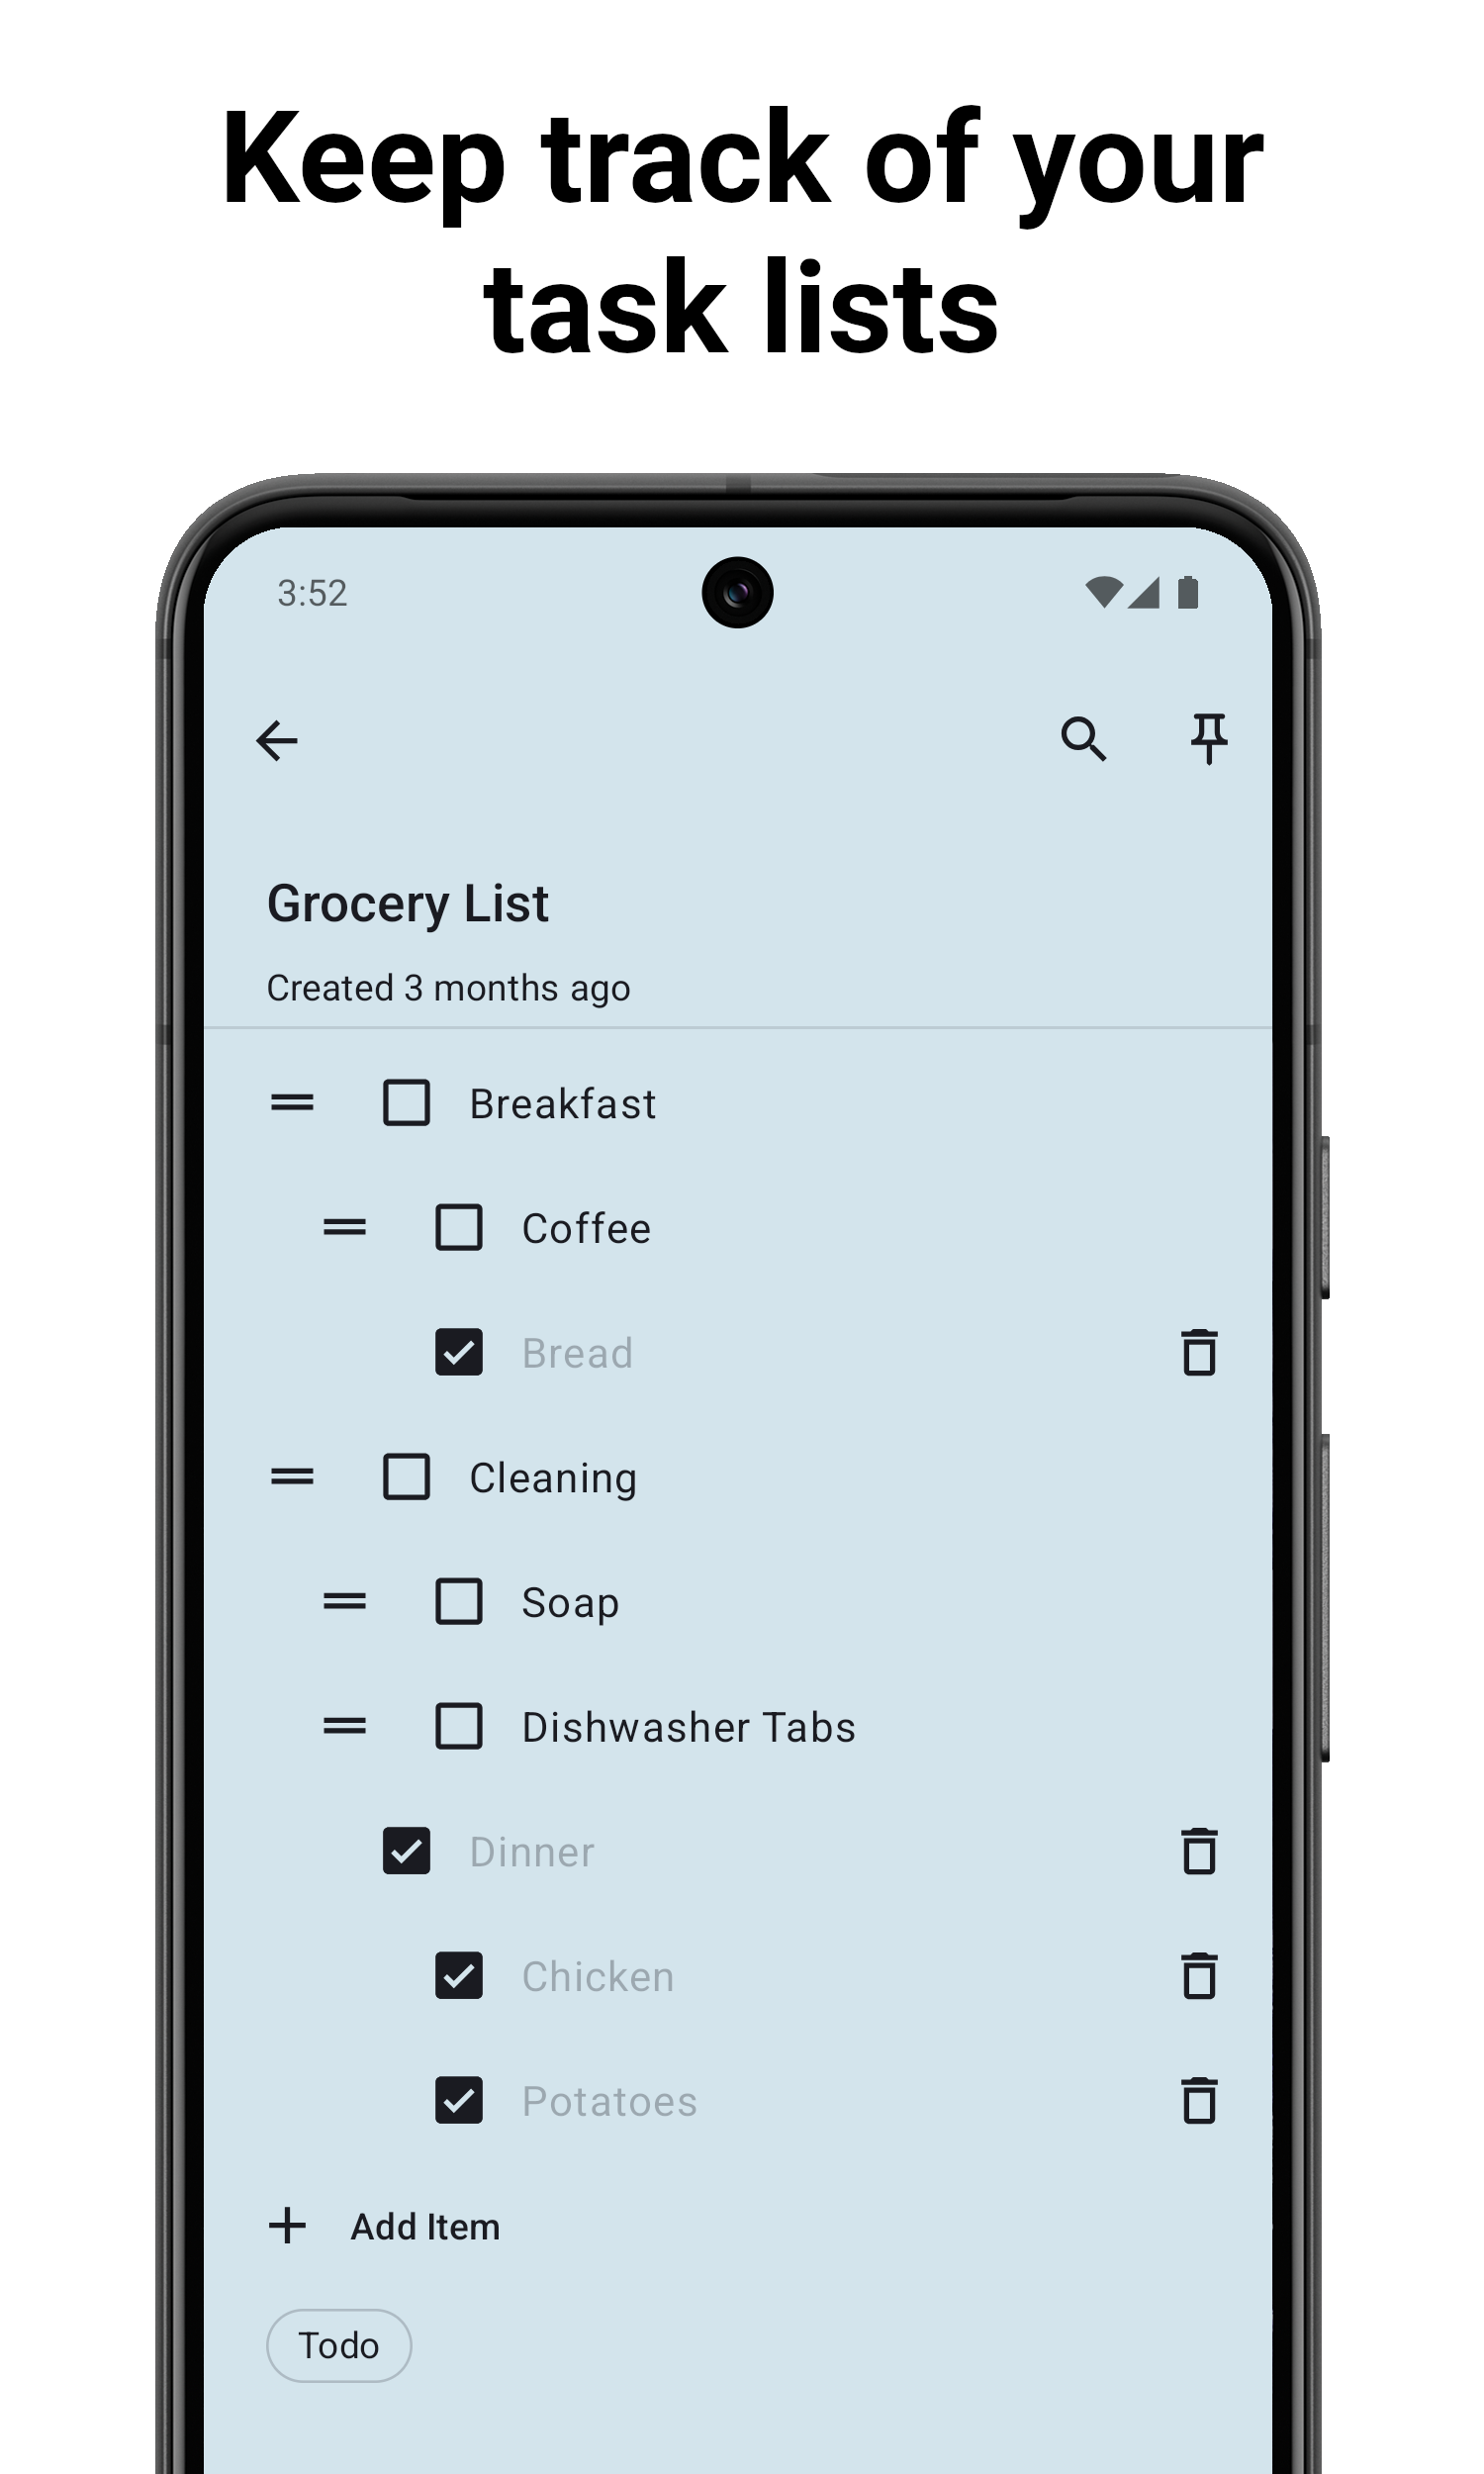
- Tap the List Note option
- Enter a title for your list (optional)
- Start typing your first item
- Tap Enter to add a new item
- Check the checkbox to mark an item as complete
- To create a subtask:
- Long press on an item
- Tap "Make subtask"
- Tap the back arrow to save and return to the notes list
For more details see ✅ Task Lists and Subtasks
Organizing Your Notes

Pinning Important Notes
To keep important notes at the top of your list:
- Long press on a note
- Tap the pin icon
Labeling Notes
To organize notes by category:
- Open a note
- Tap the label icon in the toolbar
- Select existing labels or create a new one
- Tap "Apply"
For more details see 🏷️ Labels and Organization
Coloring Notes
To visually distinguish notes:
- Open a note
- Tap the color palette icon in the toolbar
- Select a color
- Tap outside the color picker to apply
Searching Notes
- Tap the search icon in the top bar
- Enter your search term
- NotallyX will show all notes containing that text
Next Steps
Now that you know the basics, explore the Features Overview to learn about more advanced capabilities of NotallyX.