Backups
NotallyX provides several features to help backing up your data.
Auto-Backup
NotallyX can automatically back up your notes to prevent data loss.
- Open the app settings
- Navigate to "Auto Backups"
- Tap "Backups Folder" and "Choose folder" to select a folder for backups
- After you've set your backups folder you can:
- Enable auto backups whenever a note changed ("Backup on exit Note automatically")
- Enable periodic backups
- Configure the amount of previous backups to keep
Manual Backup
You can also create backups manually:
- Open the app settings
- Navigate to "Backup"
- Tap "Export backup"
- Choose a location and name for the backup
- Tap "Save"
Using Cloud-Storage/WebDAV
SAF Mounts
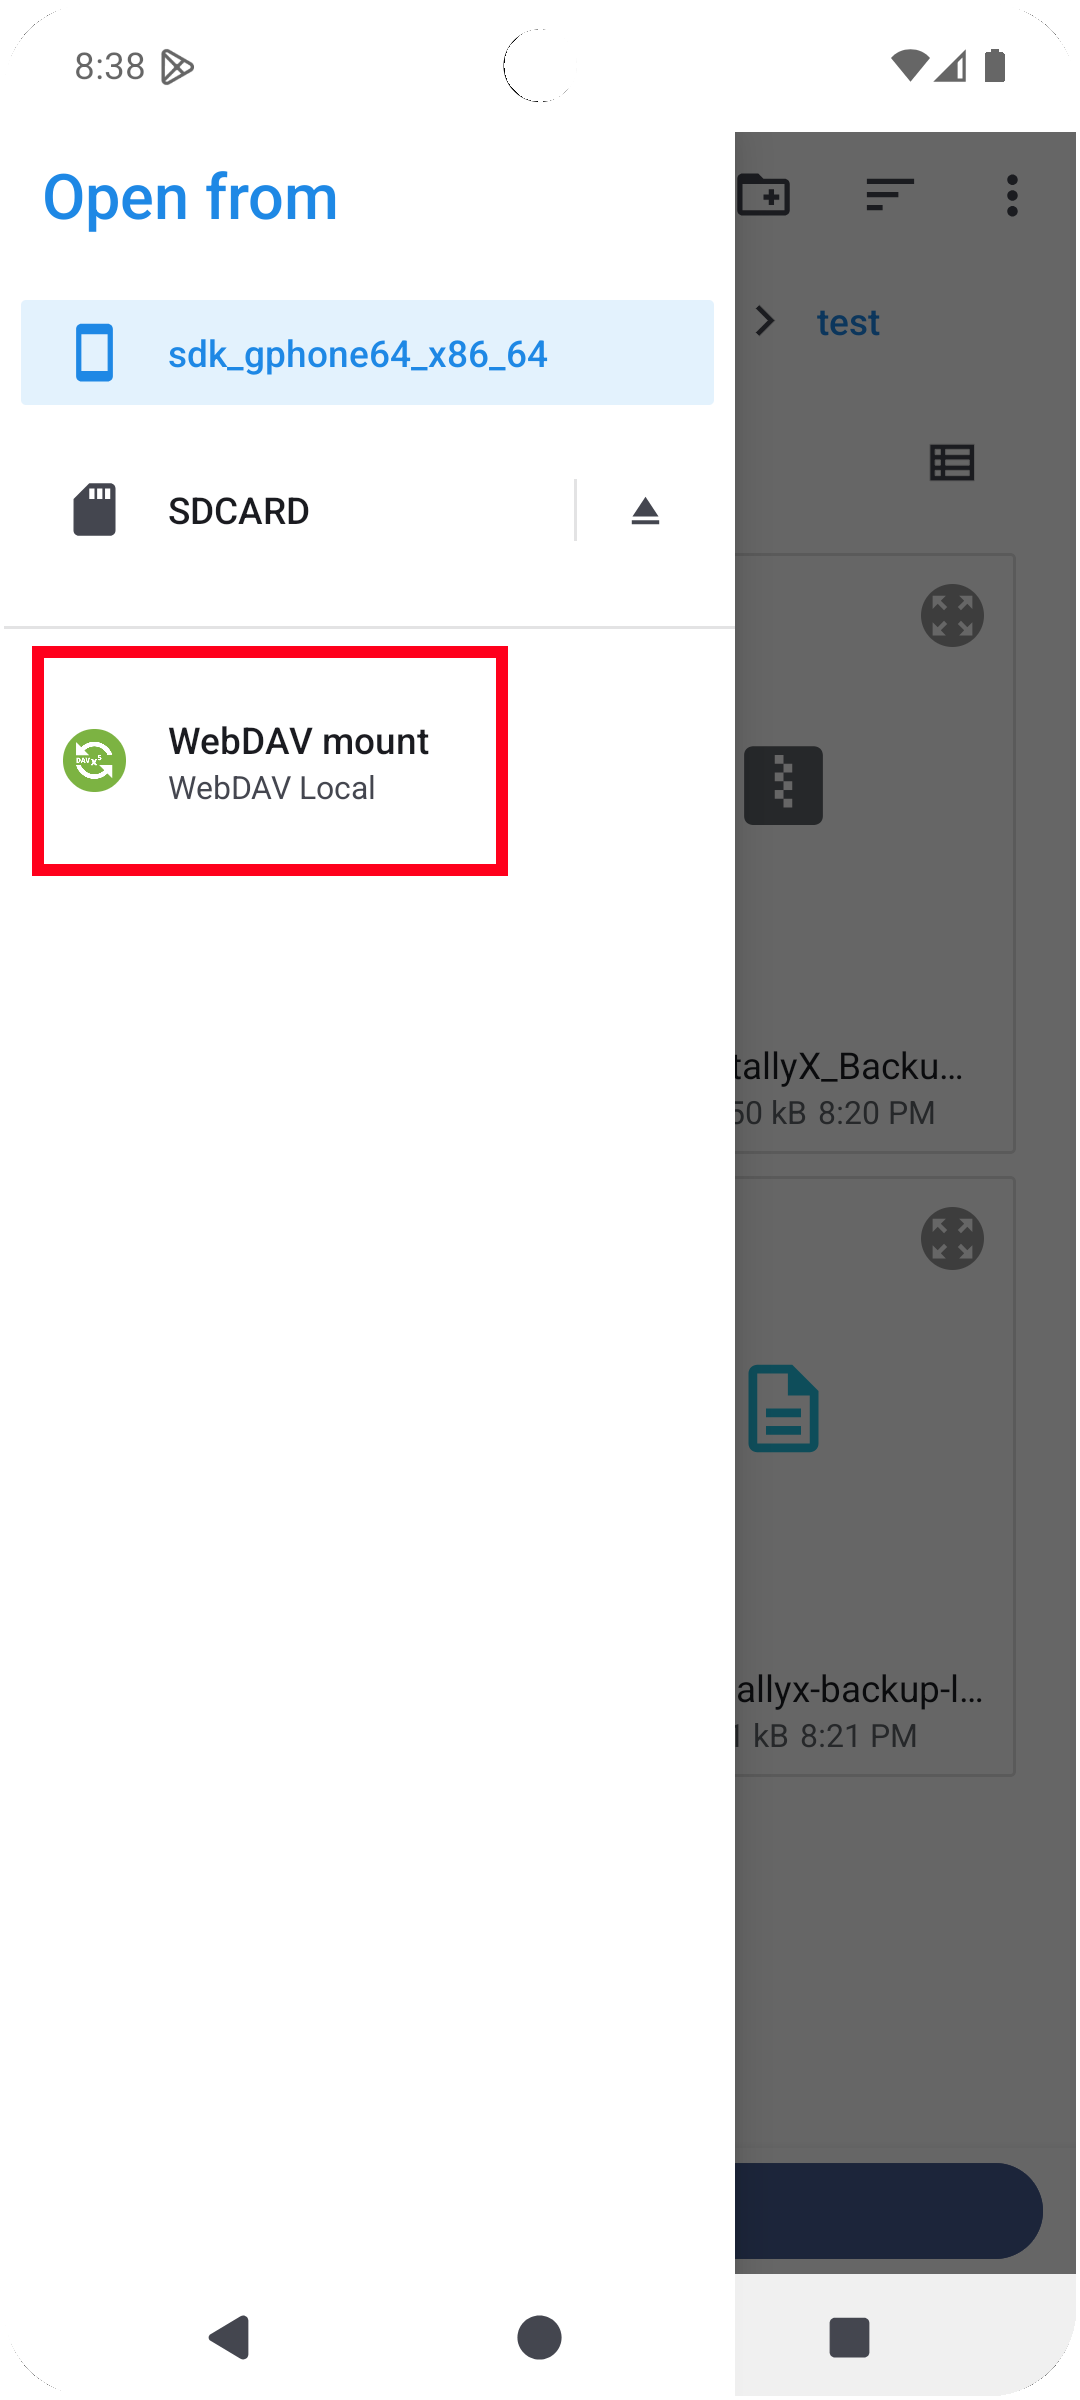
If you wish to store your backups on a Cloud-Storage/WebDAV, you need to use a third-party app to mount your Cloud-Storage/WebDAV on your device, so that the SAF (Storage Access Framework) can access it. For generic WebDAV servers you can use apps like DAVx⁵, RS File Explorer or similar, as long as they are able to mount your WebDAV server into your android system. E.g. for DAVx⁵:
- Open DAVx⁵ -> Menu ->
WebDAV mounts->+ - Enter
URL,Display Name,Username,Passwordof your WebDAV Server ->Add mount - After adding your mount, you can go back into NotallyX and setup the backup folder, you will now see your WebDAV in the file chooser and can pick any folder on it:
Synchronization
Instead of mounting your Cloud-Storage/WebDAV you can also use apps like FolderSync to sync a folder on your device with other devices and simply set NotallyX's backup folder to that synched folder.
Restoring from Backup
If you need to restore your notes from a backup:
- Open the app settings
- Navigate to "Backup"
- Tap "Import backup"
- Select the backup file you want to restore from
- If your backup is password protected, provide the correct password
- Tap "Import Backup"
Note: Importing a backup does not delete any existing notes/labels
Related Features
- Settings: Learn about ways to customize NotallyX